Keep Your Wheels Looking Their Best
Your vehicle’s wheels are the only parts that actually touch the road, making them critical to both your car’s appearance and performance. Just like hikers depend on their boots for a successful trek, your car relies on properly maintained wheels for safety and efficiency.
Brake dust can begin etching into wheel finishes in as little as one to two weeks if not cleaned, leading to permanent damage that no amount of scrubbing can fix. This abrasive mixture of metal particles and pad material doesn’t just look bad—it actively damages your wheel’s protective clear coat.
Most car owners don’t realize that wheels rank among the dirtiest surfaces on their vehicles. Between brake dust, road grime, and contaminants that collect in deep spokes and barrel areas, proper cleaning requires specific techniques and products that differ from those used on the rest of your car.
Why does this matter? Because replacing damaged wheels can cost hundreds or even thousands of dollars, while a proper 30-minute cleaning routine every two weeks can keep them looking showroom-new for years and prevent damage.
The problem is that many well-intentioned car owners make critical mistakes during the cleaning process that actually accelerate damage rather than prevent it. From using household dish soap (which strips protective coatings) to scrubbing with the wrong tools, these errors can significantly shorten your wheels’ lifespan.
Why Regular Wheel Cleaning Matters
Most wheel experts recommend a cleaning every two weeks as the sweet spot for preventing damage. This isn’t just about keeping up appearances—though a set of gleaming wheels certainly improves your car’s overall look. It’s about protecting your investment from the harmful effects of brake dust, road grime, and environmental contaminants.
If you drive in harsh conditions—areas with road salt, construction zones, or if you’re someone who enjoys spirited driving that puts your brakes to work—you might need to clean even more frequently.
The stakes are higher than you might think. Brake dust contains tiny metal particles from both your rotors and brake pads. This isn’t just dirt—it’s actually abrasive material that can physically etch into your wheel’s surface. According to industry data, these particles can begin causing permanent damage within just 1-2 weeks of accumulation, especially in hot weather.
Your wheels directly impact three critical aspects of your vehicle:
Safety is paramount—corroded wheels can develop structural weaknesses over time. Balance issues can develop as brake dust builds up unevenly, affecting your ride quality. And let’s not forget resale value—potential buyers often check wheel condition as a telltale sign of how well you’ve maintained the entire vehicle.
The chemistry matters too. Using pH-neutral wheel cleaners is essential because they dissolve iron particles without damaging your wheel’s protective clear coat. The wrong cleaning products don’t just fail to clean effectively—they can actually accelerate damage.
Where you live plays a role too. Coastal areas expose your wheels to salt air that accelerates corrosion. City drivers face more brake dust accumulation from constant stop-and-go traffic. Understanding these factors helps you determine the right cleaning schedule for your specific situation.
How Neglect Leads to Damage
The damage timeline moves faster than most of us realize. That brake dust sitting on your wheels isn’t static—it’s actively working against you, especially during hot weather.
Here’s what happens: When you drive, your brakes generate heat that transfers to your wheels. This heat accelerates chemical reactions between brake dust and your wheel’s finish. Each time you park and your wheels cool down, these particles bond more firmly to the surface. It’s a vicious cycle of heat-cycle corrosion that’s particularly damaging to alloy wheels.
Brake dust is a triple threat—it contains iron particles from your rotors, carbon compounds from your brake pads, and adhesive resins that help it stick to your wheels. This abrasive mixture essentially acts like sandpaper on your wheel’s protective clear coat with every rotation.
The progression is predictable but devastating. It starts with light staining that becomes increasingly difficult to remove. Eventually, it leads to actual pitting in the alloy itself. Once pitting begins, no amount of cleaning will restore your wheel’s appearance—only professional restoration from specialists like The Wheel Shop can address this level of damage.
Most people don’t realize just how thin the clear coat on alloy wheels actually is—typically less than 1/100th of an inch. Once this protective layer is compromised, the underlying aluminum or magnesium alloy is directly exposed to the elements, and corrosion accelerates dramatically.
Benefits of a Consistent Schedule
Following the two-week rule yields benefits that go far beyond just keeping your wheels pretty.
First, there’s the time factor. Each cleaning becomes significantly easier when performed regularly. Brake dust that hasn’t had time to bond firmly comes off with minimal effort—often requiring just a gentle rinse and light agitation rather than intensive scrubbing. A regular wheel cleaning might take just 20-30 minutes for all four wheels, while tackling months of accumulated grime could require hours of work and still yield disappointing results.
The financial benefits are substantial too. Regular cleaning extends the life of your wheels’ finish, potentially adding years before restoration or replacement becomes necessary. When you consider that a set of quality alloy wheels can cost anywhere from several hundred to several thousand dollars, this simple maintenance routine represents significant savings over time.
There’s also the detection benefit. When you’re regularly getting up close and personal with your wheels during cleaning sessions, you’re more likely to spot potential issues early—small cracks, bent rims from potholes, or unusual wear patterns that might otherwise go unnoticed until they become serious problems.
Think of wheel cleaning like brushing your teeth—it’s much easier to prevent problems with regular maintenance than to fix them after they’ve developed. Your wheels are constantly exposed to harsh conditions, and that regular cleaning routine is your best defense against premature aging and damage.
Avoid Making These Mistakes When Cleaning Your Wheels
Now that we understand why wheel cleaning matters, let’s dive into the most common mistakes that can turn your good intentions into wheel-damaging disasters.
Mistake #1: Using Abrasive or Acidic Cleaners
That bright yellow “wheel cleaner” promising to dissolve brake dust in seconds might be your wheel’s worst enemy. Harsh acidic cleaners might deliver dramatic before-and-after results, but they’re secretly stripping away your wheel’s protective clear coat with each use – like using sandpaper to remove a stain from your favorite shirt!
Different wheel finishes have unique vulnerabilities you should know about:
Chrome wheels can lose their plating when exposed to acids, leaving dull patches that can’t be polished away. Painted wheels might develop discoloration or fading from harsh chemicals. If you have polished aluminum, abrasive cleaners create tiny scratches that rob the wheel of its mirror-like shine. And those sleek matte finishes? The wrong product can create shiny spots that ruin the uniform appearance.
The science is pretty straightforward – most wheel cleaners work by dissolving iron particles in brake dust. The problem? Acid-based products aren’t selective – they’ll happily attack your wheel’s protective finish along with the brake dust. This is why pH-neutral cleaners are your wheel’s best friend for long-term care.
For stubborn brake dust situations, look for iron removers (sometimes called “fallout removers”) instead of harsh acids. These clever products actually change color when they react with iron particles, so you can literally watch them work without damaging your wheel’s finish. They target just the iron particles while leaving your clear coat and other wheel finishes unharmed.
Mistake #2: Washing the Car Body Before the Wheels
I know it’s tempting to start with the hood and work your way down, but this sequence is setting you up for double work. Think about it – your wheels are hands-down the dirtiest parts of your vehicle. They’re constantly collecting brake dust, road grime, and sometimes corrosive substances like road salt.
When you clean your car’s body first, you’ve created a pristine canvas… that’s about to get splattered when you spray those filthy wheels! That grime inevitably splashes onto your freshly cleaned paint, potentially causing scratches or forcing you to rewash those lower panels (nobody wants to do work twice!).
There’s also a practical workflow advantage to starting with wheels. You can use stronger cleaning products where they’re needed most without worrying about overspray damaging your clean paint. Plus, you won’t be rushing through wheel cleaning at the end of your wash when your back is sore and you’re ready to call it a day.
Professional detailers always follow a bottom-up approach: wheels first, then body panels, then glass, and finally interior. This sequence minimizes rework and ensures every surface of your vehicle gets the attention it deserves.
Mistake #3: Cleaning All Four Wheels at Once
I get the impulse – spray all four wheels with cleaner and maximize efficiency, right? Unfortunately, this shortcut often creates more problems than it solves. Wheel cleaners need to stay wet to work properly, typically requiring 30-60 seconds of dwell time before you agitate and rinse them off.
When you spray all wheels simultaneously, the product will likely dry on the last wheels before you get to them. This dried product creates stubborn residues and streaks that are frustratingly difficult to remove. These dried chemicals can also leave permanent spots or staining on certain finishes. And as a bonus problem, some wheel cleaners can damage rubber if they sit too long on your tires.
The one-wheel-at-a-time approach ensures your cleaning products stay wet and active throughout the process. This maximizes their effectiveness while protecting your wheels from damage. It also lets you give each wheel the attention it deserves – no missed spots or rushed corners.
As one detailer humorously noted, running around the car trying to clean all wheels at once will just make you dizzy rather than saving time! The methodical approach actually saves time in the end because you won’t need to redo any wheels due to dried product or missed spots.
Research has shown that cleaning all wheels simultaneously is one of the most common detailing mistakes that leads to subpar results and potential damage.
Mistake #4: Scrubbing Too Hard With the Wrong Tools
Your choice of cleaning tools can make or break your wheel-cleaning success. That old toothbrush might seem handy, but it could be creating micro-scratches that dull your wheel’s finish with every scrub. And steel wool? That’s like taking sandpaper to your wheels!
Different wheel areas need specific tools for safe, effective cleaning:
For the wheel face, use a soft microfiber mitt or boar’s hair detailing brush that won’t scratch. Between spokes, reach for long, flexible wheel woolies that can bend without damaging the finish. Barrel areas need a dedicated wheel barrel brush with non-abrasive bristles. Those tight lug nut recesses require a small detailing brush with soft bristles. And keep a separate stiff rubber/plastic brush just for your tires – never use your wheel brushes on rubber!
How you use these tools matters just as much as which ones you choose. Many of us instinctively scrub harder when we see stubborn brake dust, but this aggressive approach can permanently damage the finish. Instead, let your cleaning product do most of the work through proper dwell time, then use gentle agitation to lift away the loosened grime.
Wheel woolies are particularly worth the investment because their microfiber material is gentle on finishes while their flexible design reaches deep into barrel areas where brake dust loves to hide. Good tools pay for themselves in both cleaning effectiveness and extending your wheel’s lifespan.
Remember to rinse your brushes frequently during cleaning – even soft tools can cause damage if they pick up grit or debris that could scratch your wheel surface.
Mistake #5: Skipping Protection After Cleaning
You’ve spent 30 minutes carefully cleaning your wheels to a brilliant shine… and then you put away your supplies without applying protection. This common oversight is like washing your car but never waxing it – you’re missing the crucial step that makes all your hard work last!
An unsealed wheel surface is basically a welcome mat for brake dust. Without protection, those iron particles begin bonding to your wheel almost immediately after cleaning. A quality wheel sealant creates an invisible barrier that prevents this adhesion, making your next cleaning session dramatically easier.
Beyond brake dust protection, wheel sealants also shield against UV damage that causes fading and oxidation, prevent water spots by creating a hydrophobic surface that sheds water, provide a buffer against chemical damage from road salt and environmental contaminants, and some even offer heat resistance for brake-generated temperatures.
The difference in maintenance effort is striking – protected wheels might need just a quick rinse and light wipe to look showroom-fresh, while unprotected wheels demand the full cleaning process each time. That protective layer can save you hours of scrubbing over the life of your wheels.
The Wheel Shop’s expert technicians often note that wheel protection is the single most effective step for maintaining wheel appearance between professional services – it’s the secret that separates wheels that look new for years from those that quickly lose their luster.
The Correct Wheel-Cleaning Process (Step-by-Step)
Now that we’ve covered what not to do, let’s walk through the proper wheel-cleaning process from start to finish. Following these steps will ensure your wheels stay in pristine condition while avoiding potential damage.
1. Prep & Safety
Let’s face it—cleaning your wheels isn’t exactly glamorous work, but a little preparation goes a long way toward making the job safer and more effective. Before you dive in, take a moment to gear up properly.
Always wear gloves when cleaning your wheels. Not only will they protect your hands from harsh chemicals, but they’ll also shield you from potentially harmful brake dust. This is especially important with older vehicles, where brake dust might contain trace amounts of asbestos. I learned this lesson the hard way after spending an afternoon scrubbing wheels bare-handed—my skin was irritated for days!
Eye protection isn’t optional—it’s essential. Wheel cleaners have a tendency to splash back when you’re working in tight spaces between spokes. Trust me, you only need to get cleaning solution in your eyes once to never forget your safety glasses again.
Work in a well-ventilated area whenever possible. Most wheel cleaners have strong chemicals that you don’t want to breathe in concentrated amounts. If you’re working in a garage, keep the door open or a fan running to maintain good airflow.
Perhaps most importantly, make sure your wheels are completely cool before starting. Spraying cleaners on hot wheels can cause them to evaporate instantly, leaving spots and residue that are difficult to remove. Worse yet, some cleaners can actually damage your finish when applied to hot surfaces. Do the touch test—if you can comfortably rest your hand on the wheel for several seconds, you’re good to go.
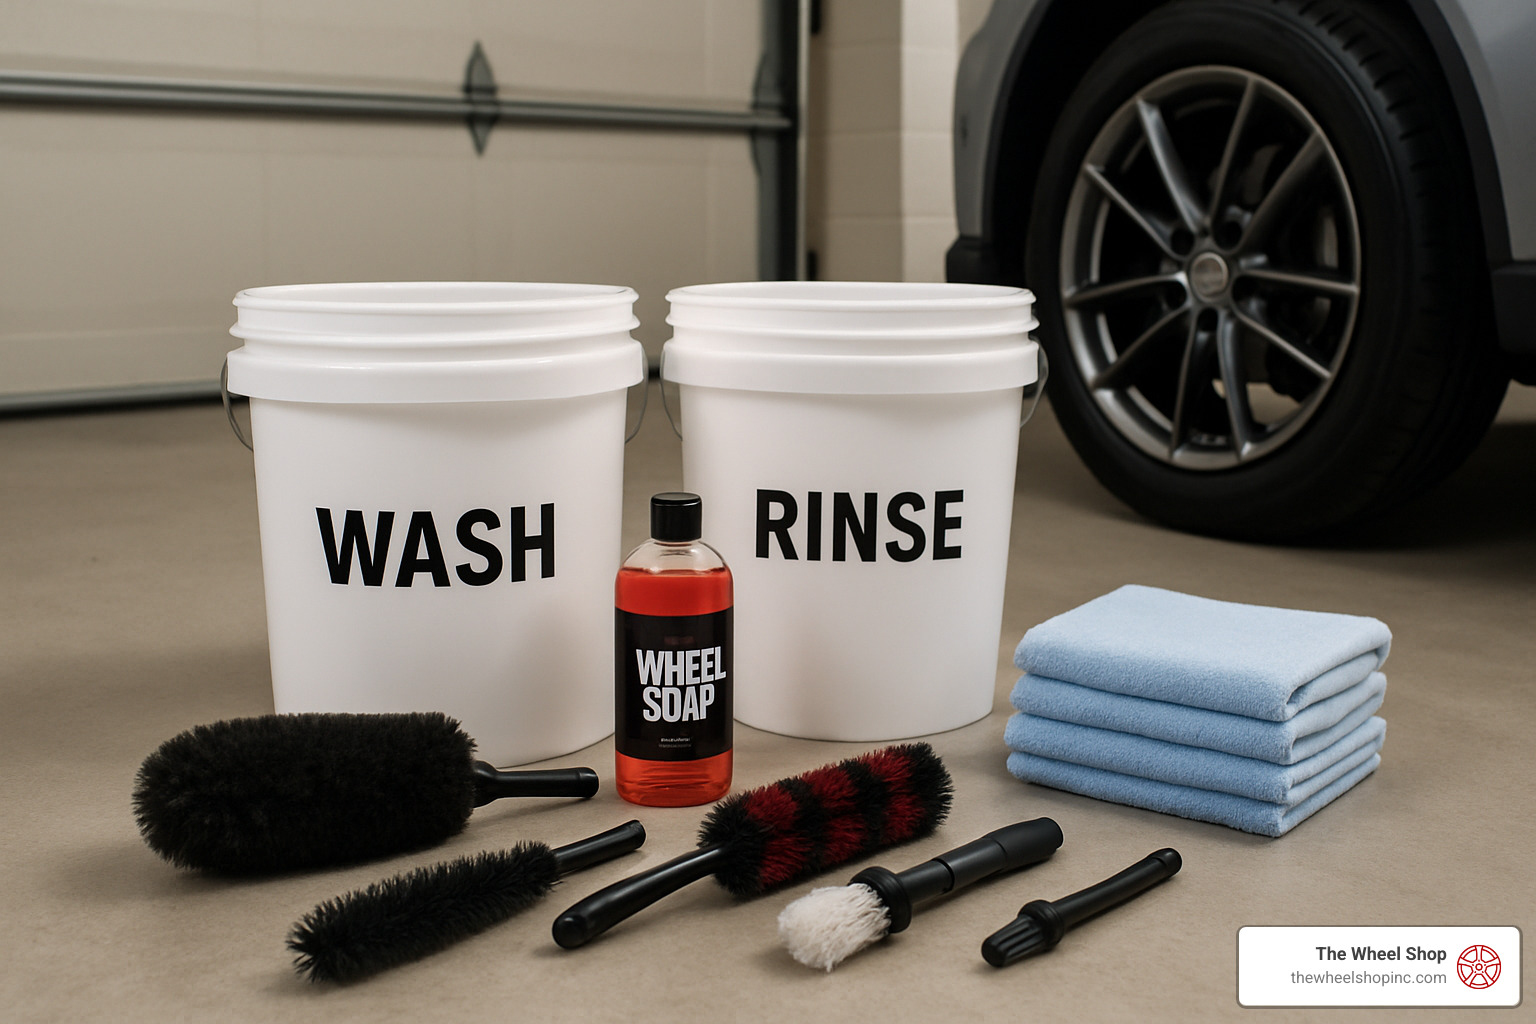
Set up your cleaning station with everything within arm’s reach:
- A dedicated wheel bucket with a grit guard at the bottom (this traps dirt particles so you don’t scratch your wheels)
- A separate tire bucket if you’re tackling tires too
- Your arsenal of brushes arranged by size and purpose
- Wheel cleaner, soap, and protection products uncapped and ready
This thoughtful setup might seem like overkill, but it makes the entire process flow smoothly. When you’re crouched down cleaning your third wheel, you’ll appreciate not having to stand up and search for that special brush you need!
Avoid Making These Mistakes When Cleaning Your Wheels by taking these safety precautions seriously—they protect both you and your valuable wheels from unnecessary damage.
2. Rinse & Dwell
The first real step in your wheel-cleaning journey begins with a thorough rinse. Grab your hose or pressure washer and give those wheels a good initial spray down. If you’re using a pressure washer, keep it on a lower setting—we want to remove debris, not strip the finish! A standard garden hose with a spray nozzle works perfectly fine too.
Make sure you’re directing water into all those hard-to-reach spots. The inner barrel of your wheel collects an amazing amount of brake dust and road grime, and those tight spaces between spokes are like magnets for dirt. This initial rinse isn’t just busywork—it removes loose particles that could potentially scratch your wheels during the cleaning process.
Once you’ve completed your rinse, it’s time for the cleaning product to do its magic. Grab your pH-neutral wheel cleaner or iron remover and apply it generously across every surface of the wheel. Don’t miss the outer face, that inner lip that’s often forgotten, all those spaces between spokes, and especially around those lug nuts where brake dust loves to hide.
Now comes the important part—the dwell time. Let that product sit on the surface for about 30-60 seconds to break down and dissolve the stubborn brake dust particles. This is where patience pays off! The cleaning agents need time to work their chemistry, loosening contaminants so you won’t need to scrub aggressively later.
If you’re using an iron remover (and these are fantastic for wheels), you’ll get to witness a bit of cleaning science in action. As the product reacts with iron particles from your brakes, it’ll typically change color to a deep purple or red. It’s oddly satisfying to watch, and also serves as a helpful indicator that you’ve covered all areas properly.
One critical tip: Never let the wheel cleaner dry on the surface! Keep an eye on it, especially on warmer days when evaporation happens quickly. Dried product can leave stubborn residues that defeat the purpose of your careful cleaning. If you notice it starting to dry, give it a quick rinse and reapply if necessary.
This dwell phase is where most of the heavy lifting happens in your cleaning process—giving the chemicals time to work means you’ll need less elbow grease in the next steps. Think of it as working smarter, not harder, for wheels that will thank you with their shine.
3. Gentle Agitation
Now comes the hands-on part of the process – but remember, gentle is the key word here. With your wheel cleaner working its magic, it’s time to help it along with some light agitation. Think of this step as coaxing the dirt away rather than scrubbing it into submission.
Start at the top of the wheel and work your way down methodically. This prevents dirty water from running over areas you’ve already cleaned. Your wheel face deserves the softest touch – a plush microfiber mitt or soft-bristled brush works beautifully here. The smooth, flat surfaces might look easy to clean, but they’re also where scratches show up most visibly.
Those pesky lug nut recesses collect an amazing amount of brake dust! A small detailing brush can reach these tight spaces without scratching your finish. Work the brush in a circular motion, letting the bristles do the work rather than applying pressure.
Between the spokes lies another dust trap. Choose a brush that fits comfortably between them without forcing it – you don’t want to accidentally scratch your wheel trying to reach difficult areas. Sometimes angling the brush differently can help you reach spots that seem inaccessible.
The inner barrel often collects the most brake dust, yet it’s the hardest area to reach. This is where those flexible wheel woolies really shine. Their bendable design reaches deep into the barrel while their soft microfiber material lifts dirt without scratching. If you can’t see the area you’re cleaning, go by feel and make sure to rinse your woolies frequently.
Remember to rinse your brushes often during this process! Brake dust particles are abrasive, and a dirty brush can end up scratching your wheels – defeating the whole purpose of your careful cleaning.
For stubborn spots that won’t budge, resist the urge to scrub harder. Instead, apply a bit more cleaner, let it dwell again, and then try gentle agitation once more. Patience prevents damage that aggressive scrubbing would cause.
If you’re also tackling your tires (which makes sense while you’re down there), be sure to use a completely separate brush with stiffer bristles designed specifically for rubber surfaces. Never use your wheel brushes on tires or vice versa – they require different cleaning approaches, and cross-contamination can damage your wheel finish.
With proper technique, you’ll find most dirt comes away with surprisingly little effort – letting the chemistry do the heavy lifting while you provide just enough agitation to help it along.
4. Thorough Rinse & Dry
After you’ve agitated all those stubborn brake dust particles loose, it’s time for what might be the most satisfying part of the process – rinsing everything away! Be methodical with your rinse, working from top to bottom and ensuring water reaches every nook and cranny. Pay special attention to the inner barrel and those tricky spaces behind the spokes where cleaning solution loves to hide. Any cleaner left behind can continue working on your wheel’s surface, potentially causing damage over time.
Drying isn’t just the final step – it’s actually one of the most critical parts of the whole process. Those innocent-looking water spots aren’t just cosmetic annoyances; they can actually etch into your wheel’s finish over time, especially if you live in an area with hard water. Think of each water droplet as a tiny magnifying glass, concentrating heat and minerals onto your wheel’s surface.
Your drying options include:
A leaf blower is perfect for blasting water out of those hard-to-reach places without any physical contact. It’s especially useful for wheels with complex spoke designs where towels simply can’t reach. Just set it to a medium power setting, and watch the water droplets dance away!
For a more hands-on approach, grab some plush microfiber towels dedicated solely to wheel duty. I can’t stress this enough – never use the same towels on your wheels that you use on your paint. Wheels collect abrasive particles that can transfer to your towels and potentially scratch your paint later.
For those really tight spaces around lug nuts and valve stems, compressed air works wonders. A few quick bursts will force water out of these trouble spots that even the most determined microfiber towel can’t reach.
Some enthusiasts even take their freshly cleaned car for a quick spin around the block. The centrifugal force helps spin off water from those impossible-to-reach areas, though be careful not to pick up new road grime in the process!
For best results, combine methods – use air to remove most water, then follow with a gentle pat-down using a microfiber towel for any remaining moisture. Your wheels will thank you with a spot-free shine that lasts.
The goal of proper drying isn’t just about appearance – it’s about preventing water spots that can become permanent marks on your beautiful wheels. Avoid Making These Mistakes When Cleaning Your Wheels by never skipping the thorough drying step!
5. Inspect for Damage
Now that your wheels are spotlessly clean and dry, you’ve got the perfect opportunity to play detective. Take a moment to carefully inspect each wheel for potential issues that might need professional attention. Think of this as a health check-up for your wheels!
With all that brake dust and grime removed, you can easily spot problems that might otherwise go unnoticed under layers of dirt. Look closely for curb rash – those telltale scrapes along the rim edge that happen during that “oops” moment with a parking curb. We’ve all been there!
Check for bends in the wheel, often caused by unfortunate encounters with potholes. These might be subtle, but they typically reveal themselves through vibration while driving, especially at highway speeds. Run your finger along the inner and outer edges of the rim to feel for any irregularities.
More seriously, examine the wheel for cracks which can occur from impacts and potentially compromise your wheel’s structural integrity. Safety first – cracks should never be ignored, as they can lead to air leakage or even catastrophic failure.
Pay special attention to the wheel’s finish. Clear coat failure appears as peeling, bubbling, or flaking of the protective finish – almost like sunburned skin that’s starting to peel. Once the clear coat starts failing, the underlying metal becomes vulnerable to the elements.
Finally, look for signs of corrosion, which typically shows up as white powdery spots or actual pitting in the wheel surface. This is particularly common in areas where road salt is used during winter months.
Catching these issues early can save you significant money and headaches down the road. Think of it like dental care – a small cavity fixed early is much better than waiting for a root canal! At The Wheel Shop, we offer specialized wheel restoration services that can address these issues before they require complete wheel replacement. Many wheel problems that look severe can actually be repaired by professionals with the right equipment and expertise.
Avoid Making These Mistakes When Cleaning Your Wheels by not just cleaning them properly, but also using that opportunity to inspect them thoroughly. Your wheels are telling you their story – you just need to take the time to listen!
Protecting Your Wheels After Cleaning
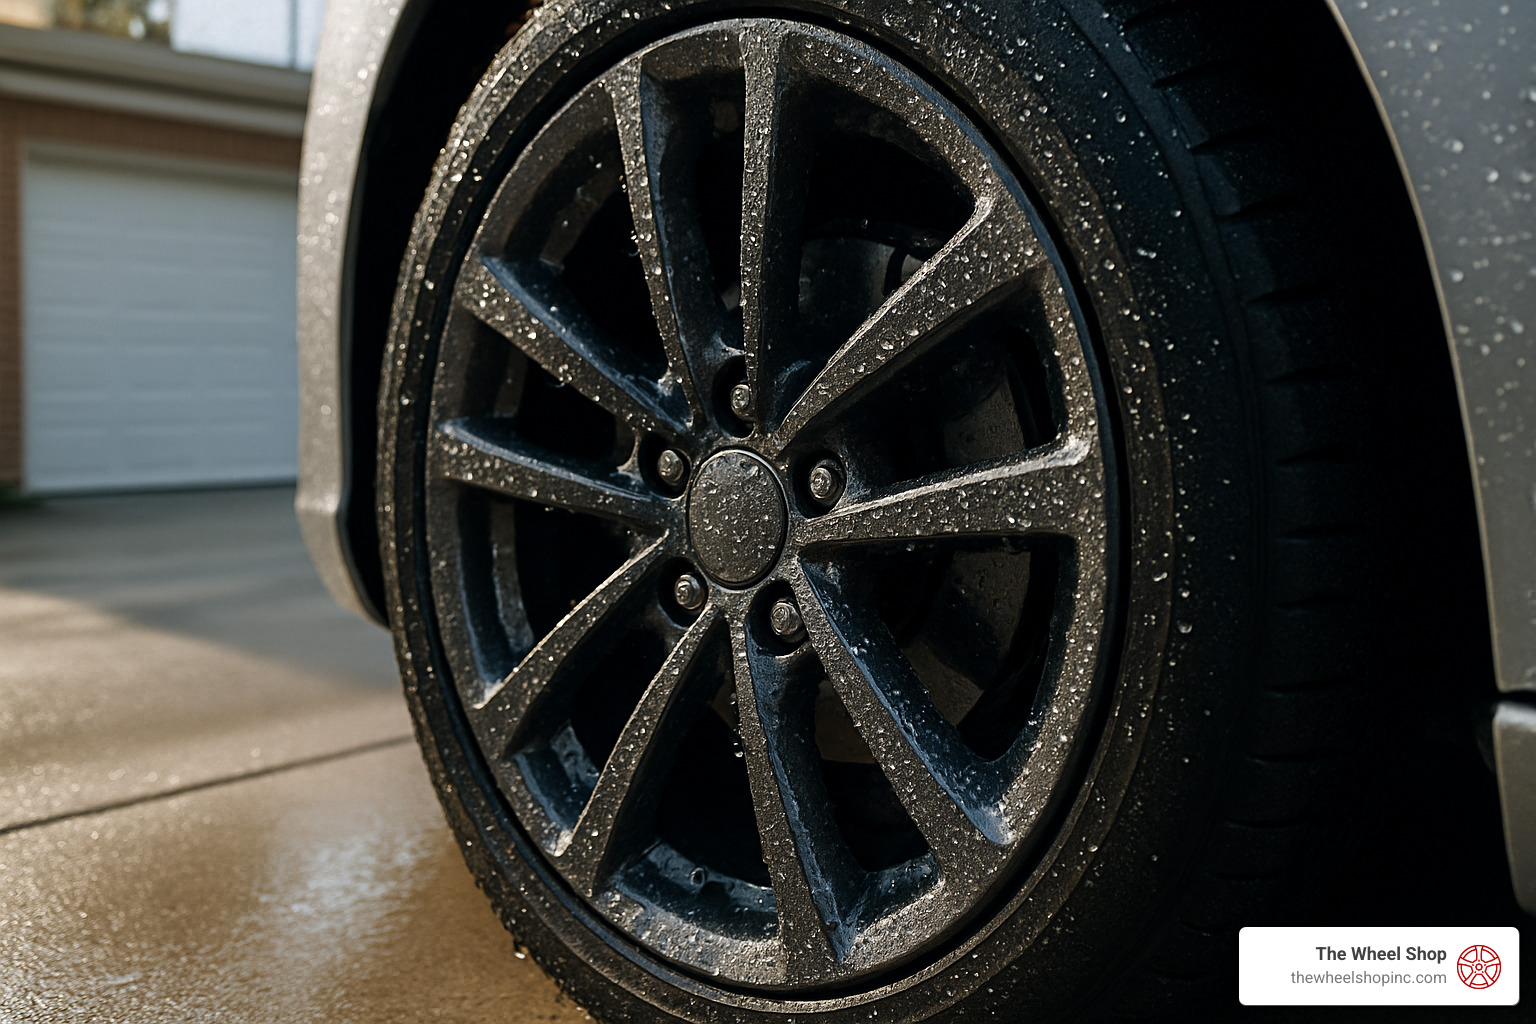
Protection is the final and perhaps most important step in wheel care. Think of it as applying sunscreen after washing your face – it’s that crucial extra step that prevents damage before it starts. Applying a dedicated wheel protectant creates a barrier between your wheels and the harsh environment they face daily.
Wheel Wax vs Sealant vs Ceramic
When it comes to protecting your freshly cleaned wheels, you’ve got options – each with its own sweet spot of protection, effort, and longevity.
Wheel wax is your entry-level protection – think of it as the quick and easy option. It’s simple to apply (even for beginners), typically costs less than other options, and gives your wheels a nice shine with decent protection. The downside? You’ll be reapplying it every 2-4 weeks as it washes away relatively quickly. Perfect for weekend warriors who enjoy regular maintenance sessions.
Polymer sealants step things up a notch. They take a bit more care to apply properly, but reward you with 3-6 months of protection. They’re the “middle child” of wheel protection – more durable than wax, better at handling heat from your brakes, and reasonably priced. For most regular drivers, sealants hit the sweet spot of protection versus effort.
Ceramic coatings are the premium option. They form a semi-permanent bond with your wheel’s surface that can last 1-2 years. They’re also the most challenging to apply (many people opt for professional installation), and they’re not cheap. But the benefits? Incredible water beading, superior protection against brake dust, excellent heat resistance, and wheels that practically clean themselves with a strong spray of water. For those who value their time and want the absolute best protection, ceramics are worth the investment.
For most of us, a quality wheel sealant offers the best balance of protection, ease of use, and cost-effectiveness. Apply it after every few washes to maintain that protective barrier. If you’re driving a vehicle you plan to keep for years, consider investing in professional ceramic coating – your future self will thank you during cleaning sessions.
Frequently Asked Questions about Avoid Making These Mistakes When Cleaning Your Wheels
How often should I clean my wheels for optimal maintenance?
The sweet spot for wheel cleaning is generally every two weeks. This timeline hits the perfect balance—frequent enough to prevent stubborn brake dust buildup, but not so often that it becomes a burden on your weekend.
That said, your specific situation might call for adjustments to this schedule. If you enjoy spirited driving with frequent braking, you’ll generate more brake dust than someone who primarily cruises highways. Similarly, if your daily commute includes construction zones or roads treated with salt during winter months, you’ll want to clean more frequently to prevent corrosive materials from damaging your wheels.
The type of wheel finish you have matters too. Bright, polished finishes tend to show dirt more readily than darker finishes, sometimes necessitating more frequent cleaning for those who want to maintain that showroom shine.
Trust your eyes on this one—if you notice visible brake dust accumulation before your scheduled cleaning, it’s best to address it promptly. When it comes to wheel care, a little prevention truly saves hours of correction down the road.
Is it safe to use household dish soap on my rims?
I hear this question all the time, and I understand the temptation—that bottle of dish soap is right there under your sink, promising to cut through grease. Unfortunately, using dish soap on your wheels is a bit like using laundry detergent to wash your hair—it’ll clean it, but not without consequences.
Dish soap is specifically formulated to strip oils and grease from your plates and pans—not to safely clean automotive surfaces. When applied to wheels, it aggressively removes protective waxes and sealants you may have applied, leaving your wheels vulnerable to accelerated contamination and corrosion.
Beyond stripping protection, dish soap can also remove essential oils from rubber components around your wheels, potentially leading to premature aging and cracking. Perhaps most importantly, unlike dedicated wheel cleaners, dish soap isn’t designed to properly dissolve iron particles in brake dust, which means you’ll likely scrub harder—risking micro-scratches in your finish.
The few dollars saved simply isn’t worth the potential damage. Investing in a quality pH-neutral wheel cleaner specifically formulated for your wheel type will pay dividends in both appearance and longevity.
What signs indicate I need professional wheel repair instead of a simple clean?
While regular cleaning can prevent most wheel issues, sometimes you’ll encounter problems that no amount of elbow grease can fix. During your cleaning routine, keep an eye out for these warning signs that signal it’s time for professional help:
Visible cracks should never be ignored, no matter how small. Even hairline fractures compromise the structural integrity of your wheel and could lead to catastrophic failure at speed. Any crack requires immediate professional assessment.
Significant bends often reveal themselves through vibration while driving or visible distortion in the wheel’s shape. Professional straightening can often restore proper function and balance without requiring full replacement.
Extensive curb rash that exposes bare metal creates an entry point for moisture and corrosion. Once scratches penetrate through the protective finish, professional repair becomes necessary to prevent spreading damage.
Clear coat failure appears as peeling, flaking, or bubbling of the protective outer layer. Once this process begins, no amount of cleaning or polishing will stop it—professional refinishing is the only solution.
Corrosion pitting indicates advanced damage where the metal itself is being eaten away. At this stage, professional restoration is required to remove the affected material and rebuild the surface.
Persistent air leaks despite proper inflation suggest damage to the wheel’s bead area where it seals against the tire. This often requires professional repair to restore proper sealing.
At The Wheel Shop in Riverside, CA, our technicians specialize in addressing these exact issues through our wheel repair and restoration services. We can often restore damaged wheels to like-new condition at a fraction of replacement cost, combining technical expertise with an artist’s attention to detail. Many customers are amazed to see their severely damaged wheels transformed back to showroom condition—often for less than half the cost of buying new wheels.
The Wheel Shop Difference
Here at The Wheel Shop, we’ve seen countless wheels that could have been saved with proper maintenance. With over twenty years of experience in wheel repair and restoration, our team understands that sometimes even the best home care isn’t enough. When you find damage during your maintenance routine—whether it’s stubborn curb rash, a bent rim from that pothole you couldn’t avoid, or finish deterioration—our wheel repair specialists are ready to help.
For those looking to completely refresh their wheels’ appearance while adding superior protection, our powder coating services for aluminum wheels offer durability that far exceeds traditional finishes. Many customers are amazed at how our wheel restoration service can transform severely damaged wheels to like-new condition at a fraction of replacement cost.
Your wheels connect your vehicle to the road—they deserve thoughtful care. By Avoid Making These Mistakes When Cleaning Your Wheels and following our guidance, you’re not just maintaining your car’s appearance; you’re preserving its performance, safety, and value for years to come.